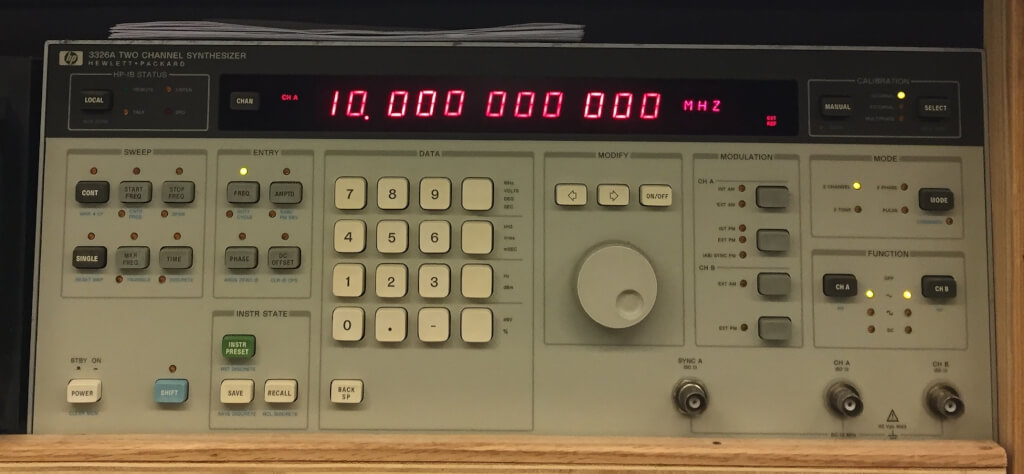
I picked this up from ebay as non-working. It was very slow to ship but it finally shipped 3 weeks after ordering. </Drama> Looks like this unit has not seen usage in a long long time..
Anyway, when I first powered it on, the fan did turn on, but nothing on the display. Cracking it open I found there were LEDs on the power supply which indicated issues… Took the power supply out of the chassis and jumped the test pins and it was working a little better. The main pass transistors are in sockets, and after pulling and replacing them, the power supply was working fine….. Until….
I put it back in the chassis, and then the power supply went into over current or over voltage protection mode… As the HP 3326A is a very very modular design, I began pulling cards out, until the error condition changed on the power supply.
The card in question had a a shorted tantalum cap on the +15 rail, which is the reference for most other rails. After I removed that shorted cap, I powered it backup, this time the display lit up, for about 5 seconds and then the power supply shutdown again. This time the indicators showed issues on the -15V rail…. Found another shorted cap, removed it, powered it back up… Another 5 seconds… Another shutdown, and another shorted cap on the -15v rail…
Tantalum caps can be very sensitive to over voltage, I did measure the power on rail voltages and they are set correctly, there is also no overshoot so It seems I’m not blowing these up, they are just failing “naturally”…
After playing this game a few times, Im up to 4 shorted caps… Will see how this goes long term, and will double check the power rails again…
This also came with option 003, which means the signal output is on the back of the unit, and not in the front.. where I want it. Moving the output BNCs to the front is simple enough, just remove the side panels, back panel, front panel, button PCB and then swap the BNC sockets from the back to front. It is a little bit of a tight squeeze on the back to get a wrench onto, but it can be done, and the output coax is plenty long.
Lots and lots of physical cleaning on this one, and I took all the buttons off the front (DANGER THIS CAN GO BADLY VERY QUCKLY AS THESE CRAP SWITCHES ARE FRAGILE) and put them in the sun with 40% Hydrogen peroxide to get the yellowing buttons back to original color. See more here regarding how to remove yellowing from old plastic process.
The switches also were “hard” to press, which is common with this style of HP switch. giving them a little squirt with some contact cleaner with some lubricant frees the switches and makes them work like new again


